German Chocolate Cake

Tags

, , ,

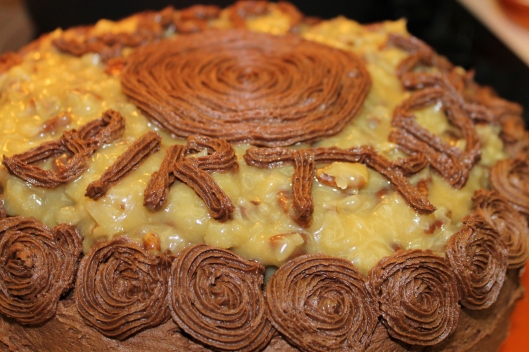
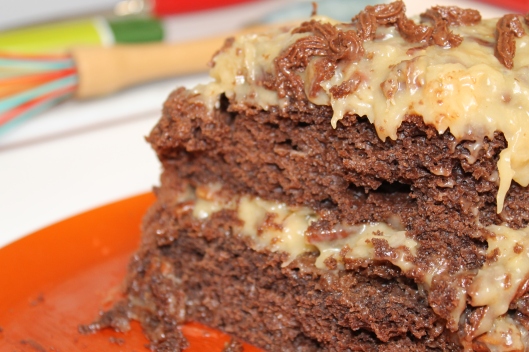
While I was home for the holidays I was lucky enough to see a lot of my family members. And while we were all together we decided to have an impromptu surprise birthday dinner for my grandfather. We’re rarely all in the same place for his birthday so when I was asked to make the cake I wanted something decadent, something extravagant, that no one was going to forget for a while. And thus, I started searching for the perfect German Chocolate Cake recipe. German Chocolate Cake is one the richest desserts I’ve had in a while. Whoever decided they wanted a moist, decadent chocolate cake, smothered in chocolate buttercream and topped with sweet, sticky coconut and pecans, was a genius.

Some people aren’t as big a fan of German Chocolate Cake, I think it may be due to the sugar overload, but somehow this recipe was loved by all, even the previous skeptics. My mouth is watering just looking at the photos and I am beyond disappointed I don’t have a slice hanging out in my fridge for me to nibble on. But, considering how much sugar is in it I think this is a once-a-year type cake.

This recipe takes some genius shortcuts, making the process a bit easier. Instead of having to splurge on those ridiculously expensive blocks of good quality chocolate this recipe calls for a box of Devil Food cake mix. I’m sure there are people out there with an aversion to cake mix but it’s really not the end of the world. And I swear no one will be able to tell there is boxed cake mix in there, if I hadn’t been careless and left the empty box on the top in the trash bin, instead of cleverly concealing it, none of my family would have believed it wasn’t completely from scratch.

So next time you have a big occasion coming up, or just feel like treating your friends to some insane chocolate-y goodness, I recommend trying this recipe out.

German Chocolate Cake
Yields 1 double layer cake or 24 cupcakes
Recipe from Your Cup of Cake

For the chocolate cake:
1 box Devil’s food cake
3 eggs
1/2 cup vegetable oil
1 tsp. vanilla
3/4 cup buttermilk
1 cup sour cream

For the German chocolate frosting:
1 cup evaporated milk
1 cup sugar
3 egg yolks, lightly beaten
1/2 cup butter
1 1/2 tsp. vanilla
1 1/2 cups chopped pecans
1 1/2 cups flaked coconut
For the chocolate buttercream:
4 oz. cream cheese
1/2 cup butter
2/3 cup unsweetened cocoa powder
3 cups powdered sugar
2 tsp. vanilla
1 tbsn. milk or cream, if needed
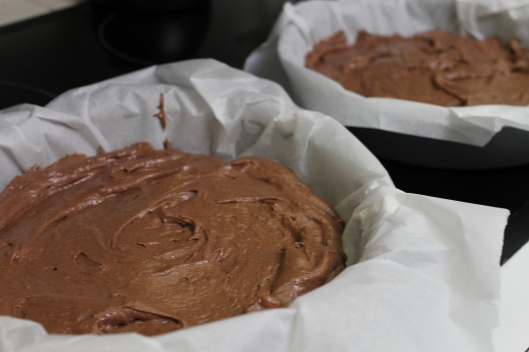
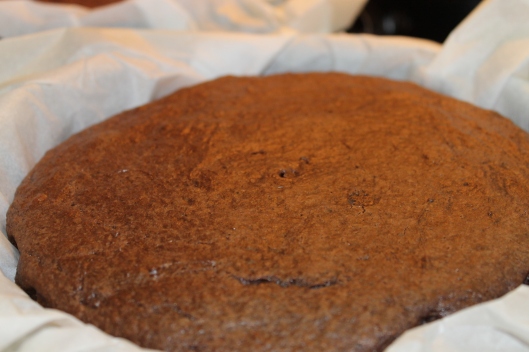
Preheat the oven to 350 F and grease and line two cake pans, set aside. In a large bowl, combine the oil, eggs and vanilla. Sift about 1/3 of the cake mix and mix until combined. Add the buttermilk and stir until combined. Add another 1/3 of the cake mix, stir to combine. Add the sour cream, then the remaining cake mix and stir until combined. Fill the cake pans and bake for 18 – 22 minutes or until an inserted toothpick comes out clean.
  
To make the frosting, over medium heat in a saucepan, constantly stir the evaporated milk, sugar, egg yolks and butter until thickened (basically until it boils, about 15 minutes). Stir in the vanilla, pecans and coconut. Let cool. To make the chocolate buttercream, beat the cream cheese and butter for 4 minutes, add the cocoa, powdered sugar and vanilla. Let beat for 3 minutes. If it is too thick, add some milk. If it is too thin, add some more powdered sugar. Place one layer of cake on a plate and cover the top with 1/2 the frosting. Place the other layer on top and frost the sides of the cake with the chocolate buttercream. Cover the top of the cake with the rest of the frosting and pipe the remaining chocolate buttercream along the edges.


Peppermint Wonders

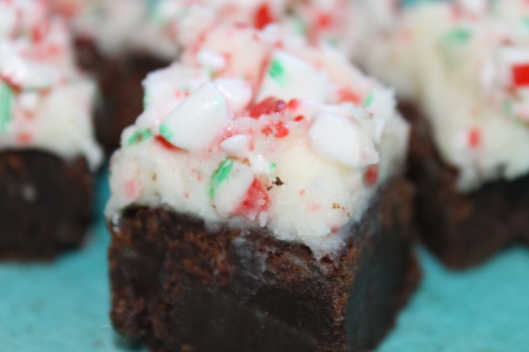
Before the holiday season is officially over I figured I would squeeze in at least one Christmas recipe. I’ve made these Peppermint Wonders before, they’re officially called Mrs. Claus’ Peppermint Wonders which I think is pretty cute. They’re supposed to be more like brownies but mine always come out with more of a fudge-y quality.

The recipe includes chopped walnuts as well but I think the crushed candy canes give it enough texture that I often leave them out. Had I actually read the recipe the whole way through before starting I would have figured this out but I ended up putting too much chocolate in the brownies, which is why they’re so moist and rich, though I really don’t think that’s a bad thing.

Instead of putting the 8 ounces of semisweet chocolate chips on the top of the brownies I added them to the batter. If you do it this way the batter will come out uncooked even after the 35 minutes, I just left them in for another five and then put them in the fridge over night so they would harden up. Then just let them sit and reach room temperature before icing and serving them. And they are incredibly rich so you only need little squares, which makes the recipe perfect for a big holiday party.

Recipe from Kids in the Holiday Kitchen: http://www.guideposts.org/recipes/dessert-recipes-peppermint-wonders

Brownies

¾ cup chopped walnuts

8 ounces (2 sticks) unsalted butter

5 ounces semisweet chocolate, chopped

2 ounces unsweetened chocolate, chopped

1 cup granulated sugar

1 ½ teaspoons vanilla extract

½ teaspoon salt

2 large eggs

7 tablespoons all-purpose flour

6 large candy canes, crushed into pieces

8 ounces semisweet chocolate chips

Frosting

2 cups powdered sugar, sifted

4 ounces (1 stick) unsalted butter, at room temperature

2 tablespoons whole milk

1. Preheat the oven to 325 degrees F.

2. To make the Brownies: Grease an 8- or 9-inch square baking pan. Line the bottom of the pan with aluminum foil, allowing extra to hang over the sides.

3. Spread the walnuts on a baking sheet and bake until toasted and fragrant, 10 to 12 minutes. Remove from the oven and let cool.

4. In a double boiler over barely simmering water or in a metal bowl over a saucepan filled with 1 inch of hot water (Creating your own double boiler), melt the butter and chocolates together, stirring often. Remove from the heat and allow to cool for about 10 minutes.

5. Stir in the granulated sugar, vanilla, and salt until well blended. Whisk in the eggs one at a time. Stir in the flour until well blended. Stir in the walnuts.

6. Spread in the prepared pan and bake until a toothpick inserted in the center comes out clean, about 35 minutes. The top should be puffy and shiny and cracked. Remove from the oven and let cool in the pan for 1 hour.

7. Lift the contents from the pan using the foil and invert onto a plate. Carefully remove the foil and turn the cake right-side up. Cool.

8. To make the Frosting: In a medium bowl, blend the powdered sugar, butter, and milk until creamy.

9. Spread the brownies with the frosting, then sprinkle with peppermint pieces and chocolate chips. Chill for 45 minutes to 1 hour. Cut into 20 small squares.

Makes 20 small brownies

Vodka Pasta

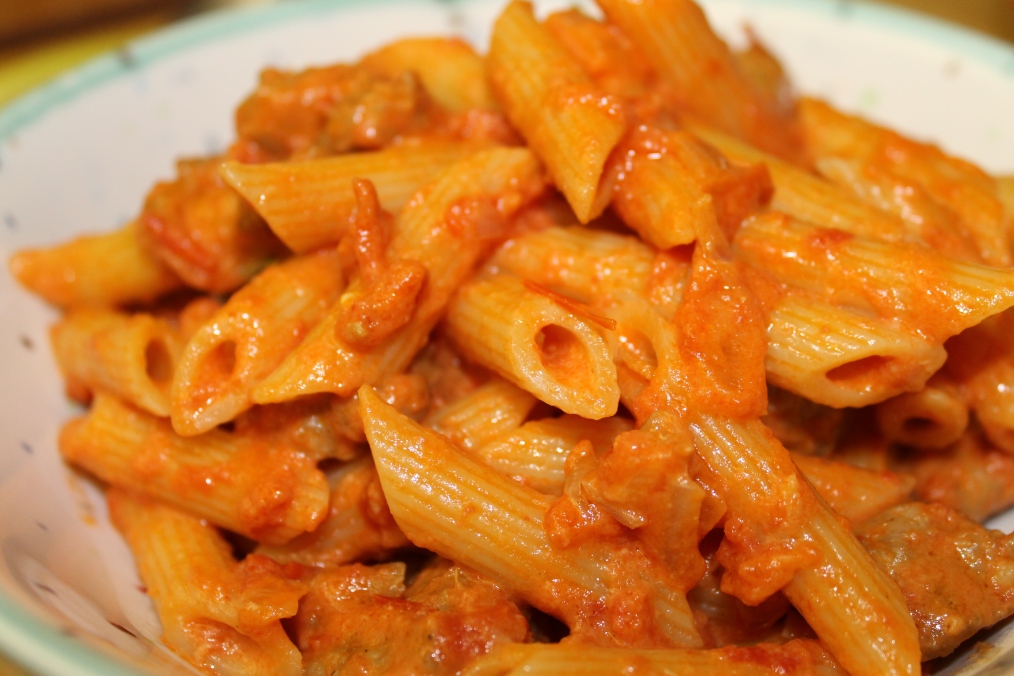
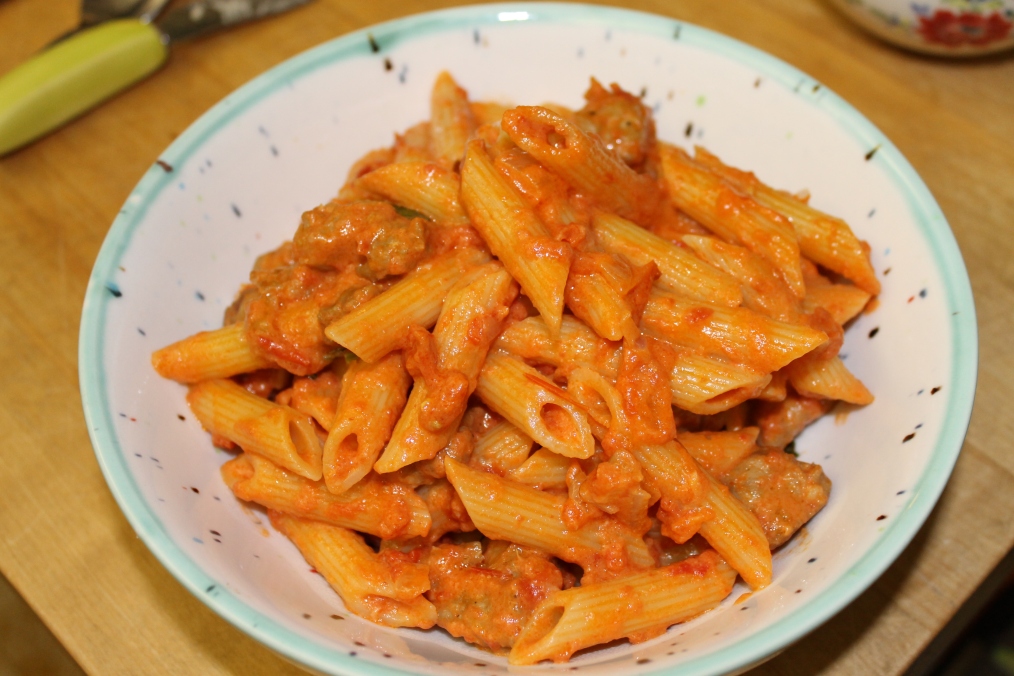
I have a new camera! So it seemed to be the perfect time to start blogging again. Now that I’m home for the holidays I have access to quite a few more ingredients than usual. I’ve made this dish before but not since the last time I was home. The recipe was adapted from a Williams-Sonoma dish by another blogger who did an amazing job of tweaking it. I wanted to give it a bit more texture so I added some sweet Italian sausage. Most of the ingredients are relatively cheap for students, the only problem could be the vodka. Whether you’re in the US and haven’t turned 21 yet, or you’re in Sydney and the liquor is crazy expensive so you can’t bring yourself to use even a drop in your cooking (that was my issue), you only need 1/2 a cup so you may just be able to borrow some. Chances are your parents, older neighbours, friends in a fraternity, or your roommate’s secret stash will have just what you need. I also know that vodka sauce is one of the easiest things to just pick up in a jar at the supermarket but once you have a homemade version you’ll realize what you’ve been missing. The result is a very creamy, sweet sauce that coats the pasta, and with the soft onions and pieces of Italian sausage the meal becomes a hearty mix of sweet and savory. It is possible to leave out the vodka but it really brings out the flavour of the tomato so I wouldn’t recommend it.  

Image

Vodka Pasta

Adapted from Cook Like A Champion

Serves 4 to 6

Ingredients:

4 tablespoons (1/2 stick) unsalted butter

3 garlic cloves,

minced medium yellow onion, diced

2 tablespoons tomato paste

1/2 cup vodka

1 (28 ounce) can crushed tomatoes

1 cup heavy cream

Generous pinch of red pepper flakes

1 teaspoon salt

2 tablespoons slivered fresh basil, plus additional for serving

1 pound penne pasta

1 pound sweet Italian sausage

1/2 cup finely grated Parmigiano-Reggiano cheese, plus additional for serving

Directions: Cook pasta in well salted water until al dente. Reserve 1/2 cup of cooking water, drain pasta and set aside.

Heat up a tablespoon of olive oil in frying pan, remove the casings from the sausages, break into small pieces and cook until browned on the outside and cooked through. Drain on a plate covered in paper towels and reserve for later.

While the pasta and sausages are cooking, melt the butter in a large skillet set over medium-high heat. Add the onion and cook, stirring occasionally, until softened, about 6 minutes. Add the garlic and continue cooking until fragrant, about a minute more. Stir in tomatoes and their juices. Bring to a simmer. Reduce heat to medium and stir in the tomato paste and vodka. Cook until most of the alcohol has evaporated, at least 5 minutes. Stir in cream, red pepper flakes and salt. Bring to a a simmer, then reduce heat to medium-low. Cook sauce until thickened, about 5 minutes. Taste and adjust seasoning as needed. Stir in basil and cheese.

Add pasta and sausage to skillet and toss to coat, adding pasta water as needed to thin the sauce. Serve topped with additional basil and Parmigiano-Reggiano.

Heavily adapted from Williams-Sonoma

Image

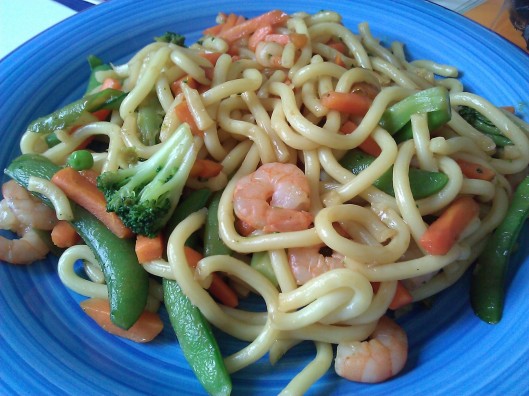
Shrimp and Veggies with Hokkien Noodles

Tags

, , , ,

Five ingredients. Ten to fifteen minutes. Doesn’t get much easier than that.

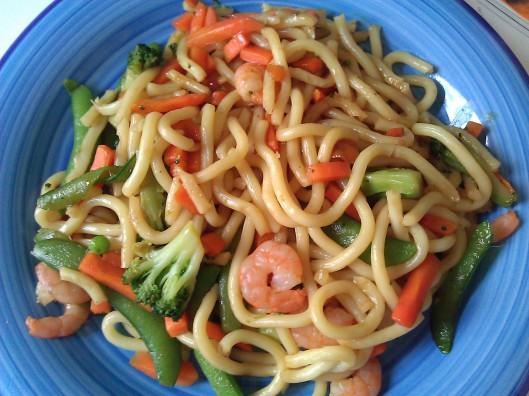
This is a meal I’ve already made twice since it’s easy, simple and tasty. It works as either a dinner or a lunch, whether you have ten minutes or half an hour. Yes, this recipe uses microwaved food and prepacked noodles but you can’t always use fresh ingredients. Plus I find it a lot easier to have some frozen veggies lying around when I haven’t made it to the markets or my veggies have gone a bit rotten.

I hadn’t really tried stir-fry noodles like this before, I used Trident Hokkien Noodles which come in a pack of two for about $4. They’re super easy since they’re already cooked and you know the exact calorie count that you’re putting in. I also had a pack of SteamerFresh Veggies in the freezer which has a mix of broccoli, snow peas and carrots. You just stick ’em in the microwave for 2 minutes and 15 seconds and you’ve got perfectly steamed veggies. They’re even pre-cut for your convenience. Sometimes the convenience of microwaveable food astonishes me.

I also used some frozen cooked and peeled shrimp from Coles, seriously I can’t stress how easy this dish is. It’s a good, hearty meal which is actually pretty healthy as well, I’m not going to say it’s the most delicious meal you’ll ever eat but it’s a great one to have on hand when you’re low on time or energy.

Ingredients:

Trident Hokkien Noodles

Frozen shrimp

Frozen steamer bag of vegetables

1 1/2 tablespoons of soy sauce

1 1/2 tablespoons of oyster sauce

Instructions:

Heat up a frying pan with some olive oil (you can also throw in some garlic to add a bit more flavour) once it’s hot, throw in the shrimp and saute them for a minute or two.

Put the veggies in the microwave and steam them and then add them to the shrimp.

Open the bag of noodles and pop those in the pan too and then stir in the soy sauce and oyster sauce.

Continue heating everything together for another minute or two and then serve it up on a plate.

Dig in and enjoy the simplicity.


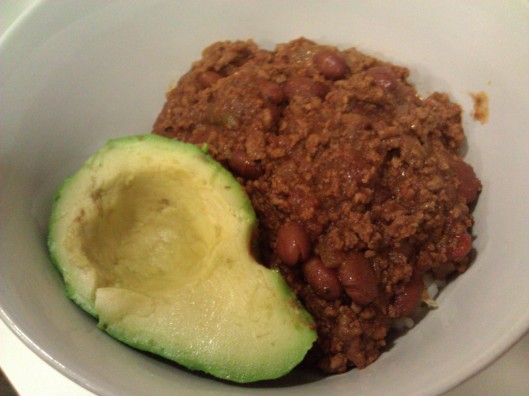
Chilli Beef on Avocado Recipe

Tags

, , , ,

This recipe comes from a delicious. cookbook and is basically fool-proof. I had been eyeing it off for a while, usually anything with avocado catches my eye, and when I finally decided to make it I was shocked at how delicious it really is. It looks incredibly simple and even the instructions are easy but somehow it creates a perfect blend of flavours and textures. The squishy kidney beans mix into the savoury yet slightly sweet beef accompanied by the soft pillow of white rice and the smooth, fresh taste of the avocado.

This is a great budget recipe for students and it is really easy to make a lot of it. I cooked for 10 people and actually had some leftovers. The only expensive part is the avocados, the ridiculous cost of avocados in Sydney blows my mind, it’s unfair that these grocery stores are trying to come between me and my love for all things avocado. But if you have time to get on your scavenger hat and find the good deals for these sumptuous little treats it will definitely be worth your time. (I got six avocados for a dollar the other day. SIX.) It was a good day.

In this recipe make sure you don’t leave anything out because its magic really comes from the perfect way all the flavours mix together. The cocoa powder is especially important because it really gives the beef that tint of sweetness.

While I was making this my roommate kept joking it looked like I was serving children in an orphanage since I had made a ridiculous amount and was shoveling it onto plates with a ladle. But despite it apparently looking like gruel in an orphanage or soup kitchen it tastes like a nice gourmet meal. So next time you’re looking to entertain a bunch of friends or the weather is a bit chilly and you want to warm your tummy with a nice bowl of chilli I recommend giving this recipe a go.

Chilli Beef On Avocado Recipe

From delicious.

Ingredients (serves 4)

(to make this for 10 people I doubled the recipe and added in an extra 500g of beef mince, so altogether it was 1500 grams of meat, and yes, that is a lot of meat)

  • 1 tbs olive oil
  • 1 large onion, finely chopped
  • 500g beef mince
  • 400g can chopped tomatoes
  • 1/2 cup (125ml) beef stock or water
  • 2 tbs tomato paste
  • 1 tbs cocoa powder
  • 1 tsp chilli powder
  • 1 tsp dried oregano
  • 420g can red kidney beans, rinsed, drained
  • 2 avocados
  • Steamed white rice, thinly sliced red onion, coriander sprigs and corn chips, to serve

Method

  1. Heat olive oil in a large frypan over medium-high heat. Add onion and cook for 2-3 minutes until soft. Increase heat to high, then add beef mince and cook, stirring, for 4-5 minutes until browned. Reduce heat to medium, then stir in the tomato, stock, tomato paste, cocoa, chilli powder and oregano, and simmer for 15 minutes. Add kidney beans and cook for 5 minutes or until heated through.
  2. Meanwhile, halve the avocados, remove the stones and peel.
  3. Divide the rice among serving bowls and top with avocado halves. Top with chilli beef, and garnish with onion and coriander. Serve with corn chips.


    (Sorry for the bad quality of this photo, I was pretty hungry and didn’t have time to get a decent one, and yes I did leave out the corriander and onion sprigs on top, I’m still a student after all and what would this post be without me leaving at least one thing out)

Creamy Chicken & Sun Dried Tomato Salad

Tags

, , , , ,

It’s been a little while since my last post but fear not, it’s not because I’ve stopped testing out recipes. This recipe popped up on the back of a bag of dried pasta and looked so good I decided to try it out. Coles has actually impressed me with many of their recipes and after the success of this one I will be trying some more in the future. It seems that Coles does a good job of distributing recipes with easy, low-cost ingredients and simple instructions.

This one features chicken, avocado and sun-dried tomatoes and has some pretty easy ingredients for a student, I had basically everything on hand after my weekly trip to the supermarket and just put in substitutions for anything that was missing.

The pasta is creamy and tangy and should be served right away so that it is still warm, it actually makes a great salad the next day as well when it has been in the fridge overnight. It only took about half an hour to make and is a great meal for a group dinner since there are a few different steps and ingredients to chop when you’re all in the kitchen.

For my Italian roommates it was one of the first times I was able to serve both meat and pasta together and I didn’t get a single complaint, I’ll take that as one step in the right direction.

Creamy Chicken & Sun Dried Tomato Salad Recipe

About 30 minutes cooking and preparation time, Serves 6 to 8

Ingredients:

700 grams pasta (something tubular is good, we used penne and fusili)

2 cups shredded or chopped BBQ chicken (we used 2 1/2 chicken breasts instead)

50 grams Rocket Leaves (our fridge was lacking rocket leaves so these were left out)

2/3 cup Sun dried tomato strips

4 spring onions, finely chopped

1 1/2 large ripe avocado

Dressing:

2/3 cup egg mayonnaise

2/3 cup sour lite cream (we substituted for natural unflavoured yoghurt which worked really well)

1 1/2 teaspoons mustard

1/4 cup white wine vinegar

Instructions:

Cook pasta according to directions.

Cook and shred (or just shred) chicken into pieces and chop tomatoes, spring onions and avocado.

Toss pasta with chicken, rocket, sun-dried tomato strips, spring onion and avocado in a large bowl.

Mix dressing ingredients together, season with salt and pepper and toss through salad.

Best served immediately. We also sprinkled some crumbled feta on top which was delicious.

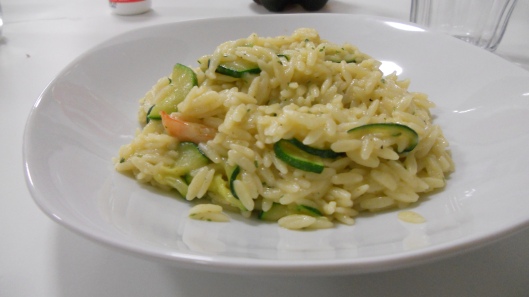
Orzo Risotto with Buttery Shrimp

Tags

, , , ,

Shrimp was on special this week! Very exciting, I know. I’d also been craving orzo for a while so I decided to throw the two together and ended up with this creamy, rich shrimp risotto. Though it takes about half an hour to whip up this meal it’s all pretty simple.

And it’s a great comforting meal for the middle of the week when you’re aching to get to Friday. The savoury shrimp are definitely a pick-me-up to get you through to your relaxing weekend. Since we usually just have pasta in this apartment it was a nice change to switch to orzo, while yes, it is still technically pasta, it’s a different taste experience than a bowl of starchy spaghetti. I’m also the only one who ever buys shrimp, usually it’s beef or steak and with my Italian roommates we always have to keep the pasta and meat separate. I’m still working on convincing them that flavour combinations can be so much better than having each part of the meal separately. It seems to be an ongoing battle.

But apparently shrimp in pasta is just fine so I went ahead and it was very well received.

Recipe: Orzo Risotto with Buttery Shrimp

Adapted from Food & Wine

Makes four servings

Ingredients:

2 medium sized zucchini (the recipe actually calls for asparagus but I didn’t have any so I substituted with my go-to veggie, zucchini)

1 3/4 cups orzo (12 ounces)

6 tablespoons butter, at room temperature

1/2 pound shelled and deveined medium shrimp

Salt and pepper

1 cup chicken stock or low-sodium broth (I keep some chicken stock cubes on hand which is really helpful for recipes like this, you can usually get about 7 or 8 for $1)(But don’t forget to add it to water to create the broth before you start your recipe, I sometimes forget, well, more than sometimes)

2 tablespoons chopped flat-leaf parsley

1/2 cup grated Parmesan cheese, plus more for serving

Instructions:

Bring a large saucepan of salted water to a boil. Add the orzo to the boiling water, cook, stirring occasionally, until al dente, for 10 minutes. When you drain it, reserve 1/4 cup of the cooking water for later.

Chop the zucchini and saute in a frying pan on medium-high heat for about 3 minutes. Set aside.

In a frying pan (you can put the zucchini in a bowl on the side and use the same pan from before) melt the butter over moderately high heat. Reduce the heat to medium and cook until the butter begins to brown. Add the shrimp, season with salt and pepper and cook over medium heat until pink and curled, about 1 minute per side.

With a slotted spoon add the shrimp the the zucchini on the side. Don’t drain the pan! Reserve the butter in the pan.

Once you’ve drained your orzo and returned it to the pan add the brown butter and stir to mix. Set the skillet over high heat and add the chicken stock, scraping up any brown bits stuck to the bottom of the pan. Pour the stock and  the reserved cooking water into the orzo; cook over medium heat, stirring until creamy, 2 minutes. Make sure you keep stirring so that nothing on the bottom gets burnt.

Stir in the zucchini and shrimp and cook until heated through. Remove from the heat. Stir in the parsley and the 1/2 cup of Parmesan. Season with salt and pepper. Transfer the risotto to bowls and serve with more parmesan.

Red Velvet Cupcakes

Tags

, , ,

I love red velvet cupcakes. I love that people think they’re fancy just because they’re red. I love the delicious cream cheese frosting they’re topped with. And I love the slight tinge of chocolate within them.

Many of my friends here had never heard of red velvet cupcakes so I figured it was time to introduce them. The birthday girl requested chocolate but many others were asking for another New York Cheesecake so I figured this would be a perfect compromise. There’s really no better way to combine chocolate and cream cheese than a red velvet cupcake.

Red velvet cupcakes are pretty simple ingredient-wise, the only thing that can be expensive is the red food dye. Because you actually need quite a lot to get that really deep red color and unfortunately it’s not one of those ingredients you can ditch to save money, though it doesn’t really add to the taste you can’t have brown red velvet cupcakes. That just doesn’t make any sense.

So we splurged on the dye and that actually ended up being our only expense since we have a pretty well stocked baking pantry.

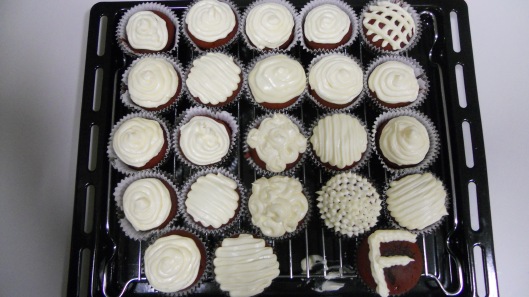
I had a lot of fun icing these too, I simply put the icing into a sandwich size ziploc bag and cut a hole in the corner and frosted away! Though the fire alarm kept threatening to go off during all the icing and I had many roommates passing by and subtly stealing a finger-full of icing out of the bowl while I was trying to complete my little designs, they still turned out just fine. It was pretty hard deciding how to decorate though, since the ones with less icing looked better, but I knew they wouldn’t taste as good without a huge mound of icing sitting on top, I decided to just do a little variety of the two.
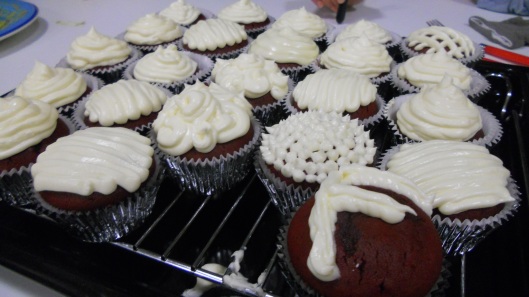
(The ‘F’ was for the birthday girl)

Recipe:

Red Velvet Cupcakes

Recipe from the Hummingbird Bakery Cookbook

makes one dozen cupcakes, I doubled it to make 24 or you can double it and make two 9-inch size cakes

4 Tablespoons unsalted butter, at room temperature

3/4 cup sugar

1 egg

3 Tablespoons unsweetened cocoa powder

2  Tablespoons red food coloring

1/2 teaspoon vanilla extract

1/2 cup buttermilk (I learned a neat little trick for making buttermilk while baking these, if you have regular milk and just add lemon juice, you can make buttermilk! I thought this was genius because I always waste money on buttermilk and use a small amount for baking and then am left with a bunch that I really don’t need. Check out the instructions here: http://www.ehow.com/how_4963834_make-buttermilk-using-lemon.html)

1 cup plus 2 Tablespoons all-purpose flour

1/2 teaspoon salt

1/2 teaspoon baking soda

1 1/2 teaspoons distilled white vinegar

Place a rack in the upper third of the oven and preheat oven to 350 degrees F.

In the bowl of a stand mixer fit with a paddle attachment, cream the butter and sugar until light and fluffy, about three minutes.  Turn mixer to high and add  the egg.  Scrape down the bowl and beat until well incorporated.

In a separate bowl mix together cocoa, vanilla and red food coloring to make a thick paste. (When I was baking I couldn’t actually get it to turn into a paste but when I added it to the batter anyway it turned out fine.) Add to the batter, mixing thoroughly until completely combined.

Turn mixer to low and slowly add half of the buttermilk.  Add half of the flour and mix until combined.  Scrape the bowl and repeat the process with the remaining milk and flour.  Beat on high until smooth.

Turn mixer to low and add baking soda and white vinegar.  Turn to high and beat a few more minutes.

Spoon batter into a paper lined cupcake baking pan and bake at 325 F for 20-25 minutes or until a skewer inserted into the center cupcake comes out clean.

Let rest in the pan for 10 minutes, then place them of a cooling rack to cool completely before frosting.
Cream Cheese Frosting:

Recipe from Hummingbird Bakery Cookbook

(This made the perfect amount for 24 cupcakes so you may have a bit leftover if you’re only making 12)

2 1/3 cups powdered sugar, sifted

3 Tablespoons butter, room temperature

4 ounces cream cheese, cold

Beat the powdered sugar and butter together in the bowl of a stand mixer fit with a paddle attachment.  Mix on medium-slow speed until it comes together and is well mixed.

Add the cream cheese all at once and beat on medium to medium-high until incorporated.

Turn the mixer to medium-high and beat for 5 minutes, or until the frosting becomes light and fluffy.

Do not over-beat as the frosting can quickly become runny.

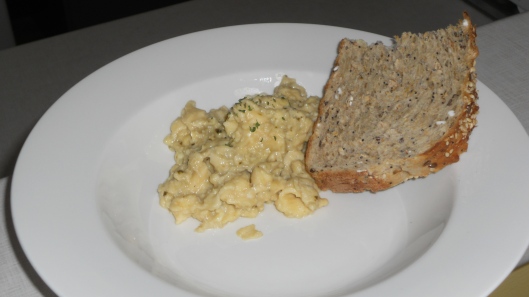
Scrambled Eggs with Pesto and Feta Recipe

Tags

, , ,

Just in time for the weekend here’s a great recipe for a simple yet delicious breakfast/brunch. I only recently tried eggs with pesto about a month ago and it really is delicious, I couldn’t believe I’d never even seen it before.

I was in the mood for a real breakfast the other day, since usually I just have a piece of toast with one of many different toppings, tomato, peanut butter, jam, vegemite…whatever I’m in the mood for that day. But I had some eggs lying around and decided it was time for a tasty little brekkie.

Ingredients: (Serves 3)

5 eggs (If you’re really hungry just double the recipe since the servings are pretty small)

1 1/2 tablespoon of pesto

Dash of milk

About 1/8 cup of Feta cheese

Salt

Pepper

Instructions:

Heat a frying pan over medium heat and throw a little bit of butter in to coat the bottom of the pan. (If you want to be healthier you can use olive oil or vegetable but I’ve grown up using butter and know that it tastes much better that way).

In a small bowl, crack all the eggs in, add a dash of milk and then whisk. Add a bit of salt and pepper.

Once the pan is hot pour the eggs in. Crumble the feta into the eggs and then cook, stirring for about 3 or 4 minutes, or until you feel like it’s done. I’m one of those people who always likes eggs a bit runny so I only cooked them for 3 minutes. Remove the pan from the heat and stir in the pesto.

Serve with a nice buttered piece of toast.

A very simple dish, but perfect for the student who wants something fancy every once in a while.